Creating a Whisperer
Creating a Whisperer is only possible with a specific access right.
The creator of the Whisperer gains immediate rights to edit any of its characteristics.
When creating a Whisperer you have to:
- Name it
- Configure it
- (option) Share it with teams or users
- Install it
And then, you may launch it manually, or as code, or through a Controller to capture systems communications.
Whisperer creation
You may create Whisperers in two ways:
- From the Team details panel
- From the Whisperer list (below)
From the Teams details panel
See Adding Whisperers to a team.
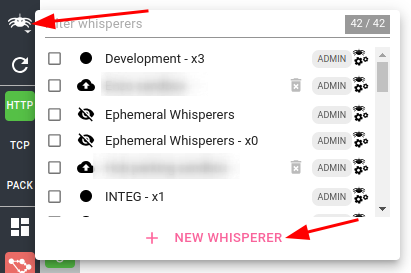
From the Whisperer list
In the Whisperer list pop-in, click the New Whisperer button:
The Create Whisperer form opens with default settings.
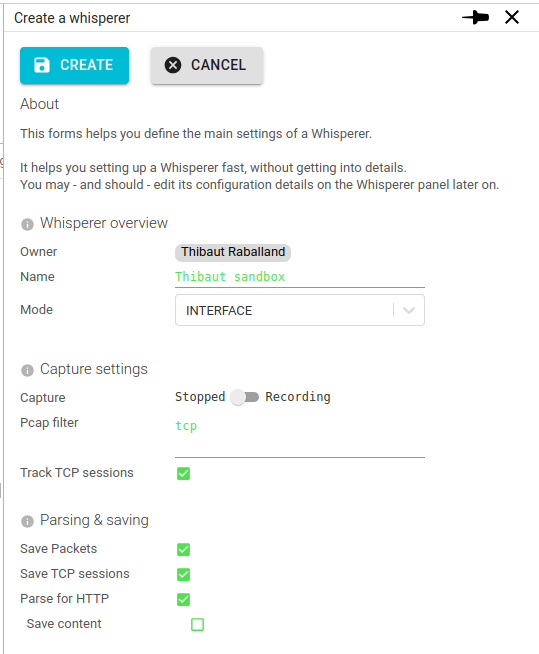
You may customize in it the main settings to get a working Whisperer out of the box:
- Name
- There is no uniqueness constraints on Whisperer name.
- But it is best to have a meaningful name when selecting it later on!
- Usually, the Whisperer name matches to an environment or an application.
- Mode
INTERFACEto capture and stream data from a network interfaceUPLOADto upload data from the UI
- If the Whisperer should be capturing straight after creation
- A Pcap filter to limit the TCP or UDP ports to watch
- If the Whisperer should track TCP sessions
- A few key saving and parsing parameters
To know more about configuration, see Configuring a Whisperer
Once created, you may already start attaching this Whisperer to a Kubernetes workload.
Or, to capture the network on a Virtual Machine, Physical Host or a Container outside Kube, you need to install it first.